Deploying an Azure OpenAI Model and Connecting It to Progress Agentic RAG
Summary Flow
- Create Azure account and subscription
- Create Azure OpenAI resource
- Open Microsoft Foundry from the resource overview
- Deploy a model via the Model Catalog
- Retrieve API key and endpoint from Foundry UI
- Configure Azure OpenAI in Progress Agentic RAG
1. Azure Account, Subscription, and Access (Prerequisite)
Before deploying a model, you must have:
- An active Azure account
- An Azure subscription with billing enabled
- Access to Azure OpenAI Service
Depending on your tenant and region, Azure OpenAI access may require approval.
Outcome
- A subscription capable of hosting Azure OpenAI resources
2. Create an Azure OpenAI Resource
This step is completed in the Azure Portal.
Steps
- Create a new Azure OpenAI resource
- Specify:
- Subscription
- Resource Group
- Region
- Pricing tier
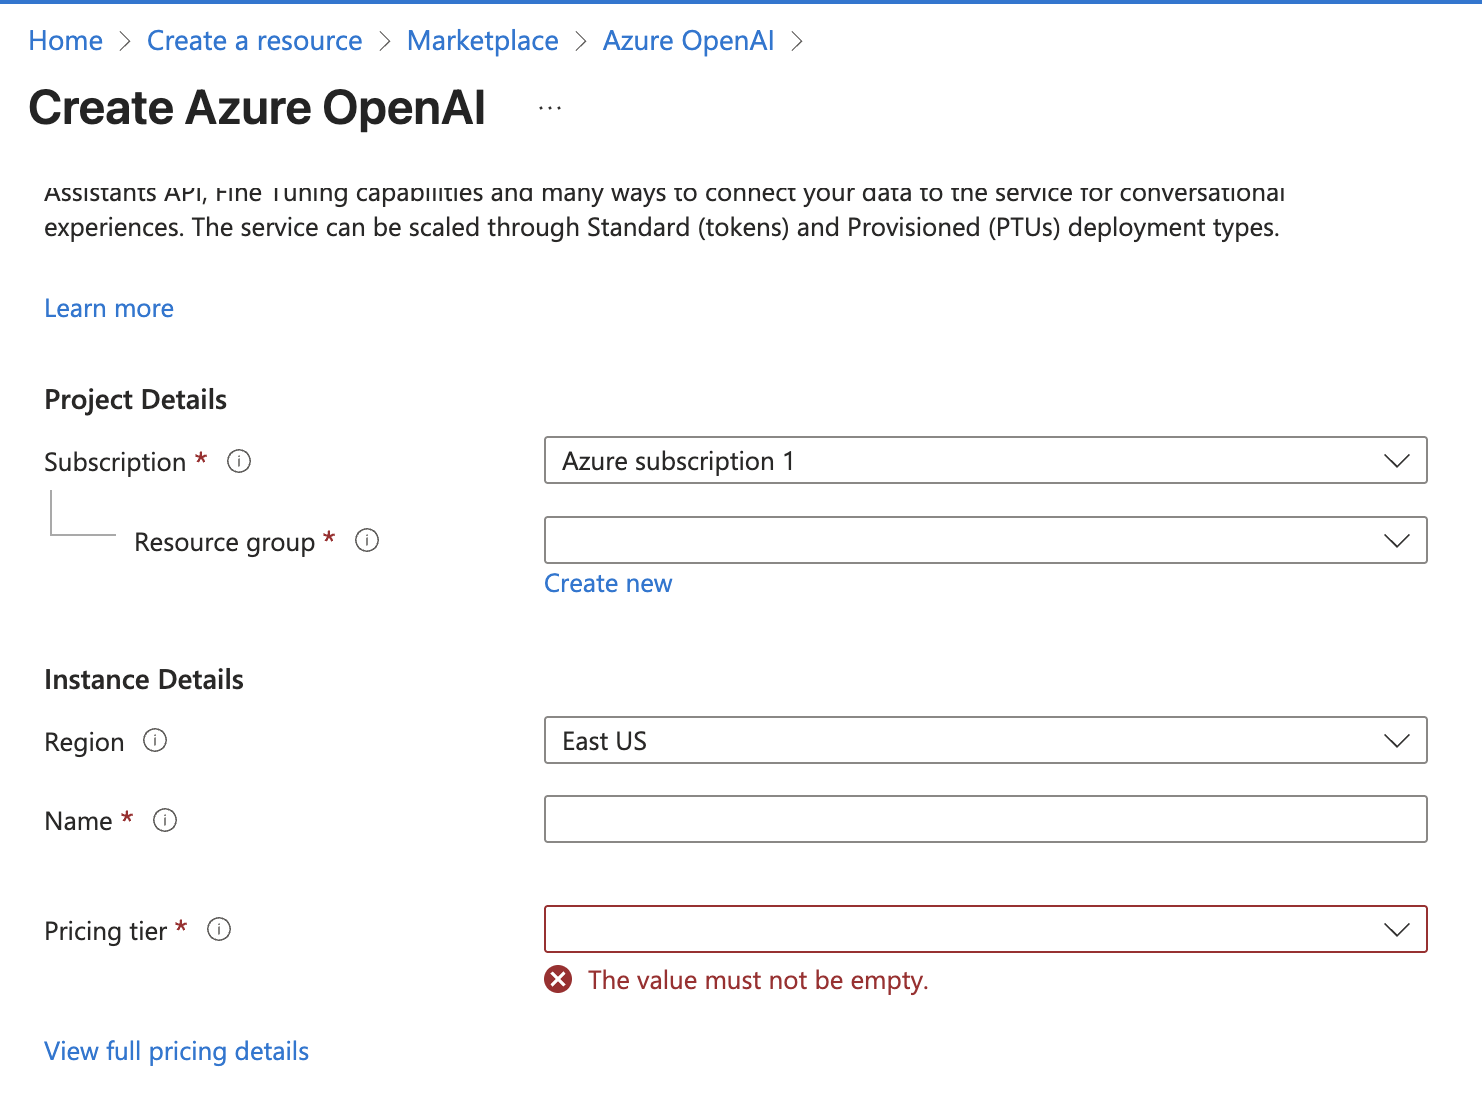
- Complete resource creation
The pricing tier determines billing and usage limits and must be selected at creation time.
Outcome
- A named Azure OpenAI resource that will host your model deployments
- This resource will later supply the endpoint URL
3. Access Microsoft Foundry from the Azure OpenAI Resource
Once the Azure OpenAI resource is created, model deployment and configuration occur in Microsoft Foundry.
Steps
- Open the Azure OpenAI resource in the Azure Portal
- From the Overview page:
- Scroll to Explore and deploy
- Select the option to open the Foundry experience
This routes you to the Foundry instance associated with your specific Azure OpenAI resource.
Outcome
- You are now operating inside Foundry, scoped to your Azure OpenAI resource
4. Deploy an LLM Using the Foundry Model Catalog
All model deployment configuration happens in Foundry.
Steps
- Open the Model Catalog from the left-hand navigation
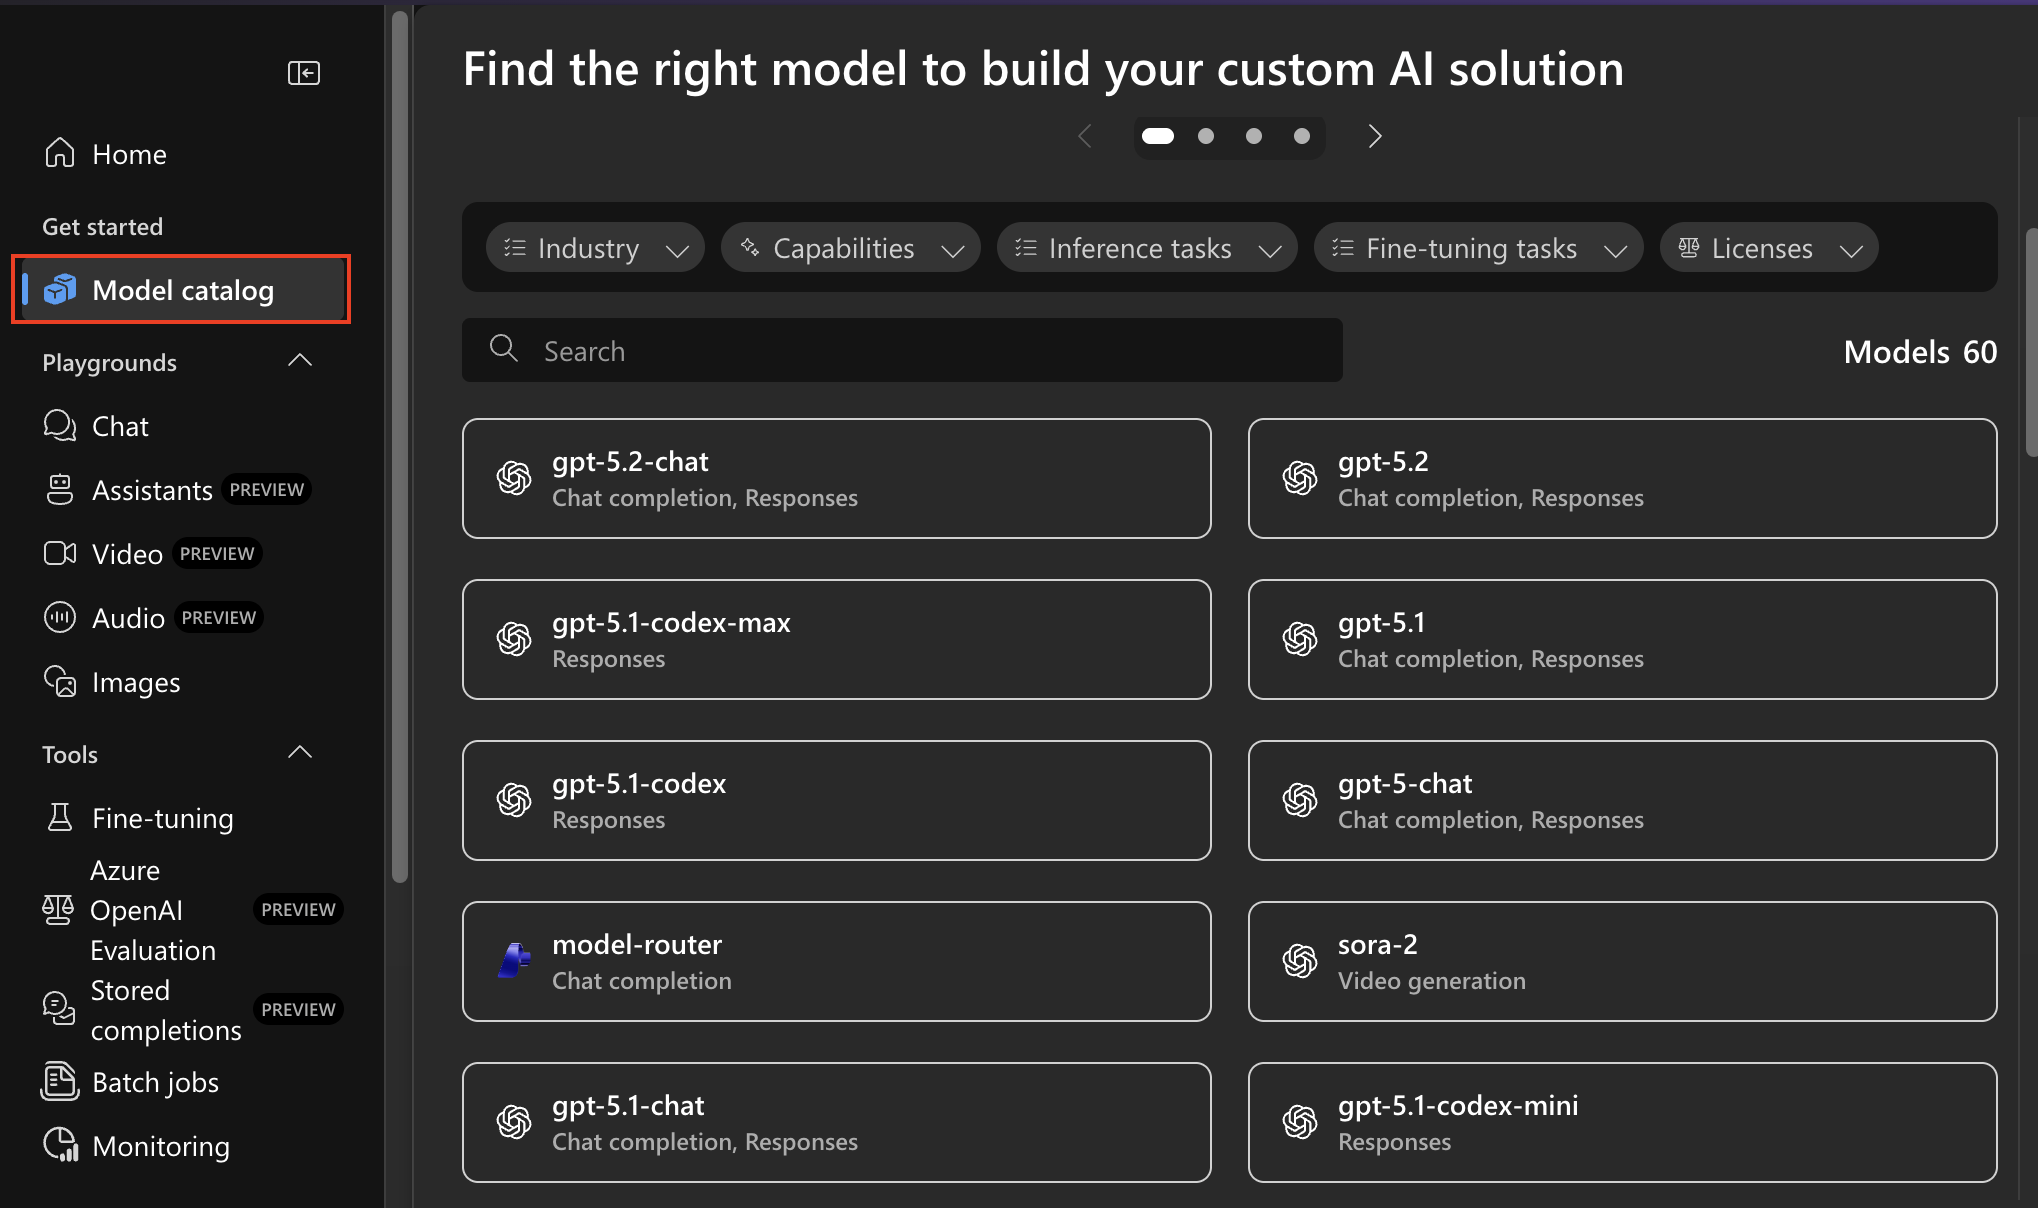
- Select the desired model (for example:
gpt-4o-mini) - Configure the deployment:
- Deployment name
- Deployment type
- Model version
- Model upgrade policy
- Any additional deployment options
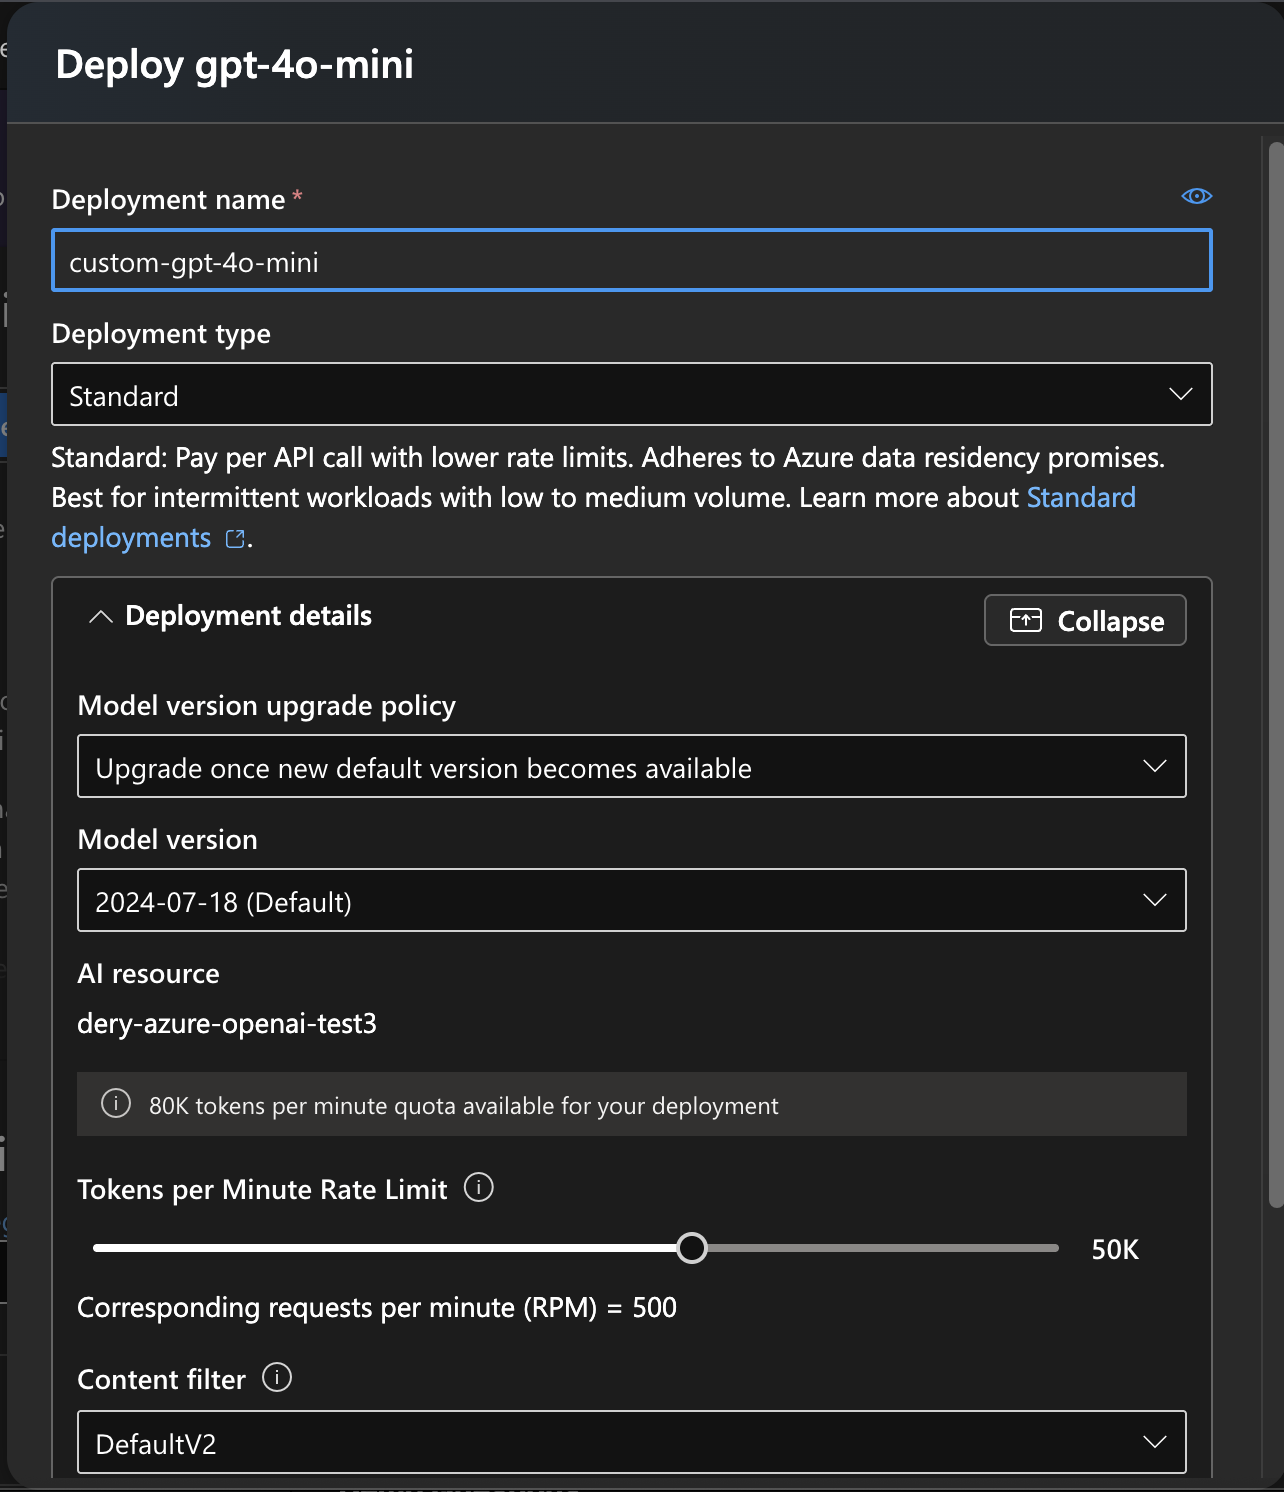
- Deploy the model
Verification
- Open the Deployments tab in the left-hand navigation
- Confirm the deployment appears and is active
Important distinctions
- Model name: the actual model selected (e.g.
gpt-4o-mini) - Deployment name: a custom identifier you define and must reference exactly later
Outcome
- A live Azure OpenAI model deployment ready to receive requests
5. Retrieve API Key and Endpoint URL from Foundry
Authentication details are retrieved directly from Foundry.
Steps
- Navigate to the Home page in Foundry
- Copy:
- API key
- Azure OpenAI endpoint URL
Outcome
- Credentials required to authenticate external clients
6. Configure Azure OpenAI in Progress Agentic RAG
This step connects your deployed model to Progress Agentic RAG.
Required Configuration Values
| Field | Source |
|---|---|
| API Key | Foundry |
| Endpoint URL | Foundry |
| Deployment Name | Foundry |
| Model Name | Foundry |
Steps
- Select Azure OpenAI as the LLM provider
- Enable Use your own Azure OpenAI key
- Enter:
- API Key
- Endpoint URL
- Deployment Name
- Model Name
- Save the configuration
- Test answer generation
Outcome
- Progress Agentic RAG uses your Azure-hosted LLM for answer generation